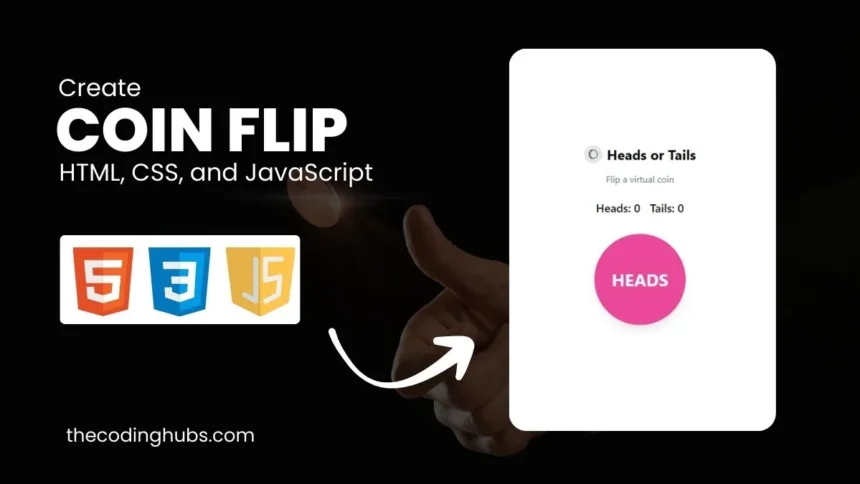
Flipping a coin has long been a simple way to make decisions, but did you know you can replicate this experience on your website with just a few lines of code? In this tutorial, we’ll walk you through how to create a coin flip using HTML CSS and JavaScript. Whether you’re a beginner or an experienced developer looking to add a fun feature to your site, this guide will have you flipping coins in no time.
Introduction
Creating interactive elements on a website can greatly enhance user experience, making your site more engaging and fun. A virtual coin flip is a perfect example of a simple yet interactive tool that can be easily implemented using basic web development skills. This guide will demonstrate how to build a coin flip application from scratch, utilizing HTML for structure, CSS for styling, and JavaScript for the functionality that makes the coin flip possible. Coin flip using HTML CSS and JavaScript
You might like this:
- Online Ticket Booking Website Project
- Create a Chatbot with HTML CSS and JavaScript
- Make Calculator in HTML CSS and JavaScript
- Resume Generator App
Coin Flip using HTML CSS and JavaScript HTML Structure
Let’s create a coin flip using HTML CSS and JavaScript. The first step in creating our coin flip application is setting up the basic HTML structure. This includes creating the elements needed to display the coin, track the results, and handle the user interaction.
If you would instead do this, scroll down and click the provided download button to get the Coin Flip using HTML CSS and JavaScript source code files.
Here’s the HTML code of the coin flip using HTML CSS and JavaScript you’ll be working with:
<!DOCTYPE html>
<html lang="en">
<head>
<meta charset="UTF-8">
<meta name="viewport" content="width=device-width, initial-scale=1.0">
<title>Heads or Tails</title>
<script src="https://cdn.tailwindcss.com"></script>
<style>
body {
    @apply bg-gradient-to-b from-white to-gray-100 flex items-center justify-center min-h-screen;
}
.coin {
    transition: transform 0.6s ease, background-color 0.3s ease;
    cursor: pointer;
}
</style>
</head>
<body>
<div class="flex flex-row min-h-screen justify-center items-center">
<div class="text-center content-evenly">
<div class="flex items-center justify-center space-x-2 mb-4">
<div class="w-8 h-8 bg-gray-200 rounded-full flex items-center justify-center">
<img src="coin.png" alt="coin icon" class="w-4 h-4">
</div>
<h1 class="text-2xl font-bold">Heads or Tails</h1>
</div>
<p class="text-gray-500 mb-6">Flip a virtual coin</p>
<div class="text-xl font-medium mb-8">
Heads: <span id="headsCount">0</span> Tails: <span id="tailsCount">0</span>
</div>
<div class="flex items-center justify-center">
<div id="coin" class="coin bg-pink-500 text-white text-3xl font-bold w-40 h-40 rounded-full flex items-center justify-center mb-8 shadow-lg">
HEADS
</div>
</div>
</div>
</div>
<audio id="flipSound">
<source src="Coin Flip Sound Effect.mp3" type="audio/mpeg">
</audio>
</body>
</html>
Explanation of the HTML Code
- DOCTYPE and Meta Tags: The
<!DOCTYPE html>declares the document type and the<meta charset="UTF-8">tag sets the character encoding, ensuring that your page displays text correctly. The<meta name="viewport"tag ensures the page scales correctly on different devices. - Title: The
<title>element sets the page title to “Heads or Tails,” which will appear in the browser tab. - Tailwind CSS: The script
<script src="https://cdn.tailwindcss.com"></script>includes Tailwind CSS, a utility-first CSS framework that helps in quickly styling the page. - Custom Styles: The
<style>block defines custom styles using Tailwind’s@applydirective to apply a gradient background and center the content. - Body Structure: The
<body>contains a div that centers the content both vertically and horizontally using Flexbox. Inside, there is a header, a description, counters for heads and tails, and the coin element itself.
Styling the Coin with CSS
Now, we will style our coin flip using HTML CSS and JavaScript. CSS is used to give our application its visual appeal. Here, we’re utilizing Tailwind CSS to simplify the process, but you could easily modify or replace the styles with custom CSS.
body {
@apply bg-gradient-to-b from-white to-gray-100 flex items-center justify-center min-h-screen;
}
.coin {
transition: transform 0.6s ease, background-color 0.3s ease;
cursor: pointer;
}
Explanation of the CSS Code
- Body Styles: The body of the page has a gradient background (
bg-gradient-to-b from-white to-gray-100) and uses Flexbox to center all content both horizontally and vertically. - Coin Styles: The coin element is given a smooth transition effect for both its transformation and background color changes, making the flipping action more visually appealing.
Adding Interactivity with JavaScript
Now, we are going to add some interactivity in our coin flip using HTML CSS and JavaScript. JavaScript is where the magic happens, bringing the coin to life with a simple flip action and sound effect.
let headsCount = 0;
let tailsCount = 0;
const flipSound = document.getElementById('flipSound');

function flipCoin() {
    const coin = document.getElementById('coin');
    const result = Math.random() < 0.5 ? 'HEADS' : 'TAILS';
    flipSound.play();
    coin.style.transform = 'rotateY(180deg)';
    setTimeout(() => {
        coin.textContent = result;
        coin.style.transform = 'rotateY(0deg)';
        if (result === 'HEADS') {
            coin.style.backgroundColor = '#ec4899'; // Pink for Heads
            headsCount++;
            document.getElementById('headsCount').textContent = headsCount;
        } else {
            coin.style.backgroundColor = '#3b82f6'; // Blue for Tails
            tailsCount++;
            document.getElementById('tailsCount').textContent = tailsCount;
        }
    }, 300);
}

document.getElementById('coin').addEventListener('click', flipCoin);
document.body.onkeyup = function(e) {
    if (e.keyCode == 32) {
        flipCoin();
    }
}
Explanation of the JavaScript Code
- Variables:
headsCountandtailsCountkeep track of how many times each result has occurred. - Coin Flip Function: The
flipCoin()function handles the flipping logic. It randomly determines the result of the coin flip usingMath.random(), changes the coin’s text and color, and updates the respective counter. - Event Listeners: The event listeners detect either a mouse click on the coin or a press of the spacebar, triggering the flip.
Enhancing User Experience with Sound
Adding sound effects can make the coin flip experience more engaging. In our example, we included an audio element that plays a coin flip sound whenever the coin is flipped.
<audio id="flipSound">
    <source src="Coin Flip Sound Effect.mp3" type="audio/mpeg">
</audio>
Output
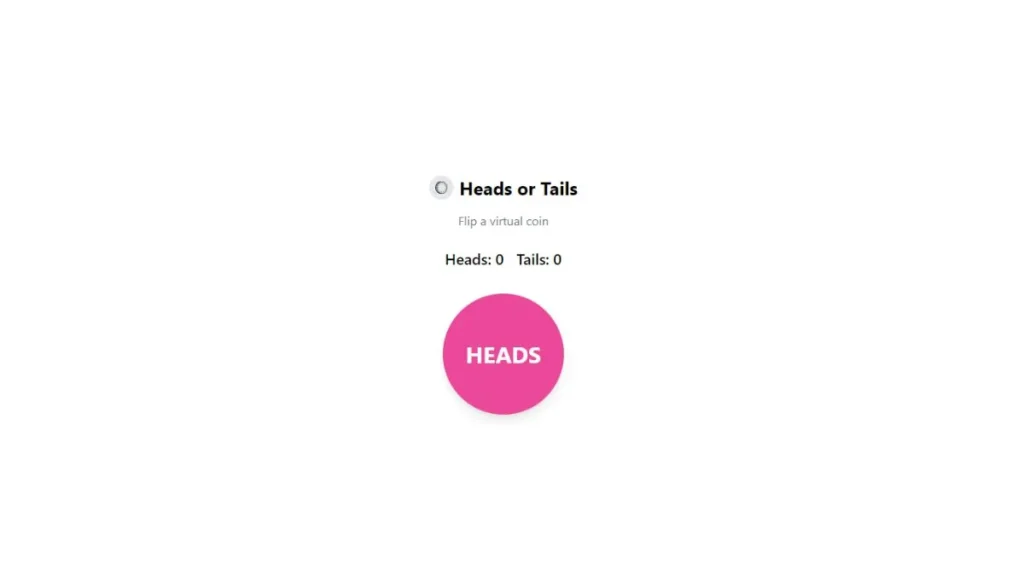
Conclusion
Creating a coin flip using HTML, CSS, and JavaScript is a great way to practice your web development skills and add a fun, interactive element to your site. This simple project demonstrates the power of combining structure, style, and functionality to create a compelling user experience. Whether you’re building this as part of a larger project or just for fun, you’ll find that the principles covered here can be applied to countless other interactive elements on the web.
If you would instead do this, scroll down and click the provided download button to get the Coin Flip using HTML CSS and JavaScript source code files.
If you found this tutorial helpful, check out more coding tips and tutorials on The Coding Hubs.
Download Coin Flip Using HTML CSS and JavaScript
Frequently Asked Questions (FAQs)
How do I change the coin’s colors?
You can customize the coin’s colors by modifying the CSS properties in the flipCoin() function where the background colors are defined.
Can I use custom images for heads and tails?
Yes, you can replace the text inside the coin with images by using the img tag and toggling between different images based on the flip result.
Is it possible to add a counter for total flips?
Absolutely. You can easily add another variable to keep track of the total flips and update it each time the coin is flipped.
Can I use this code on my website?
Yes, feel free to use and modify this code to fit your needs. It’s a simple, fun feature that can be a great addition to any site.